
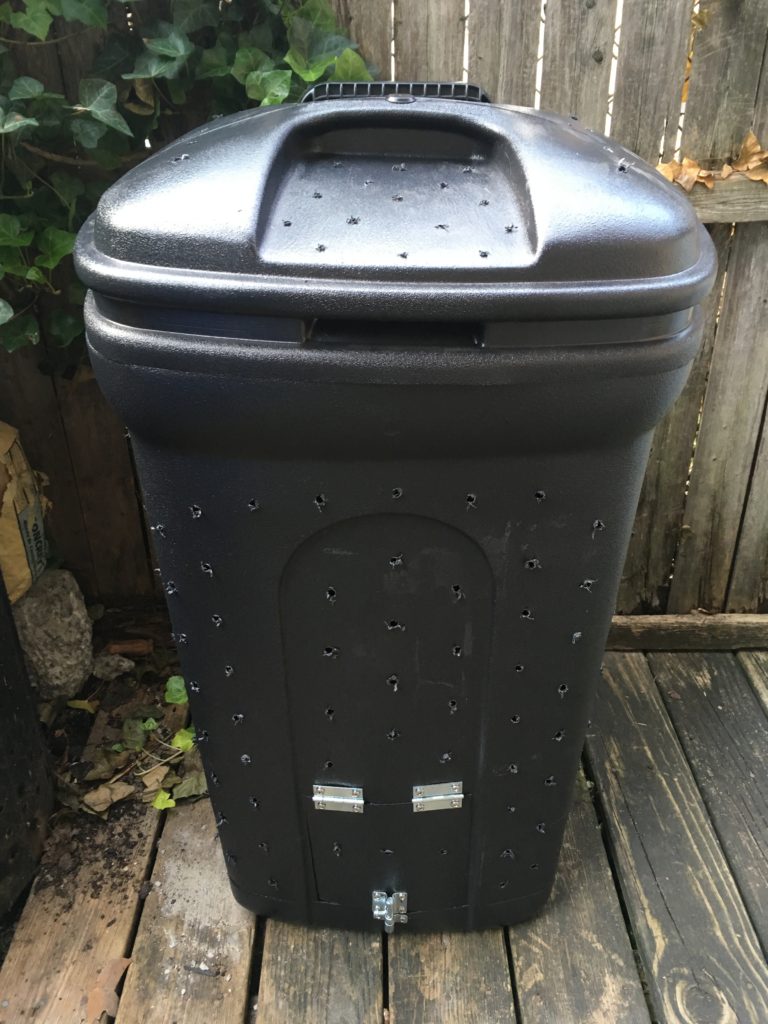
I made another trash can composter today- this time with a nice door upgrade. What for?
Now that my first composter is filled up, it’s going to be tedious to empty out the finished compost 6 months from now. With the door at the bottom, I hope to remove the finished material much easier.
All in all, the project cost me less than $30 and about an hour of work… better yet, it was a cinch to make.
I picked a trash can that had a relatively flat side so it would be easier to attach hinges flush to the surface.
Here’s a close-up of the door at the bottom:

To build the door, I drilled the holes for all three hinges and screwed them in place first (don’t mount the washers and nuts yet).
Second, I used a boxcutter to cut out the door…I made it a good 10″ tall to give my hand some clearance to fish around and remove finished compost.
Next, I threaded the nuts on the screws on each of the hinges and tightened them down.
Finally, I used a 3/16″ bit to drill aeration holes on all sides of the bin plus the lid.
Clean up and dispose all of the plastic shavings from the inside and the outside.
That’s it!
Now you’re ready to divert organic materials from the landfill- Feels good, doesn’t it?
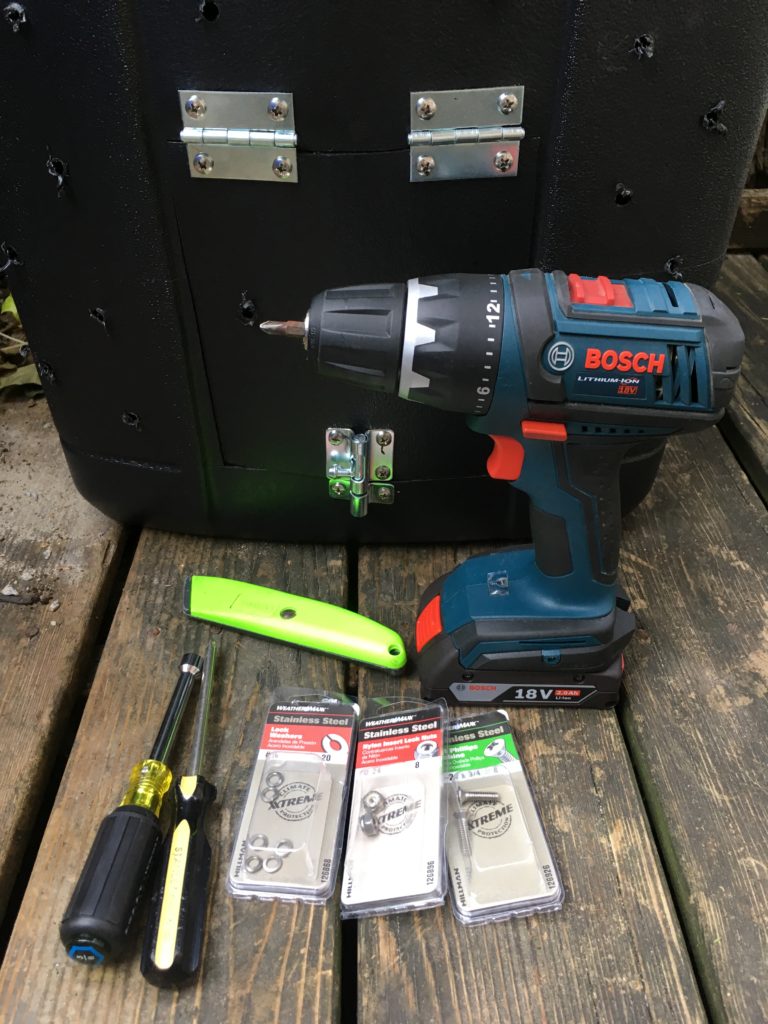
Equipment List:
-Phillips head screwdriver
-Drill
-3/16″ drill bit for ventilation holes
-Socket wrench (or adjustable wrench)
-2 hinges
-1 latch
-Nylon insert lock nuts
-Lock washers
-Stainless steel screws
Here’s a video I made to show you how to add materials to the bin:
Cheers!
Why did you make the door open up instead of down?
ha! good question.
i just knew i didn’t want it opening left or right, and I wanted to be able to empty it directly into a tray so I didn’t want the door in the way.
I’m sure it could work either way, though.